Welcome to Amazing Minds, where learning is always fun!
Welcome to Amazing Minds, where learning is always fun!
Welcome to Amazing Minds, where learning is always fun!
Welcome to Amazing Minds, where learning is always fun!
We are Amazing Minds! A hands on, educational enrichment program running after school / summer enrichment classes in schools, park districts and camps since 2001. Even at home and outside of the classroom, we want to continue to encourage the intellectual growth of each child and continue our mission at making learning FUN! We want to help YOU and your child engage in our fun, hands on, creative, topic based activities. We have adapted and created some activities for home! ENJOY!
______________________________________________________
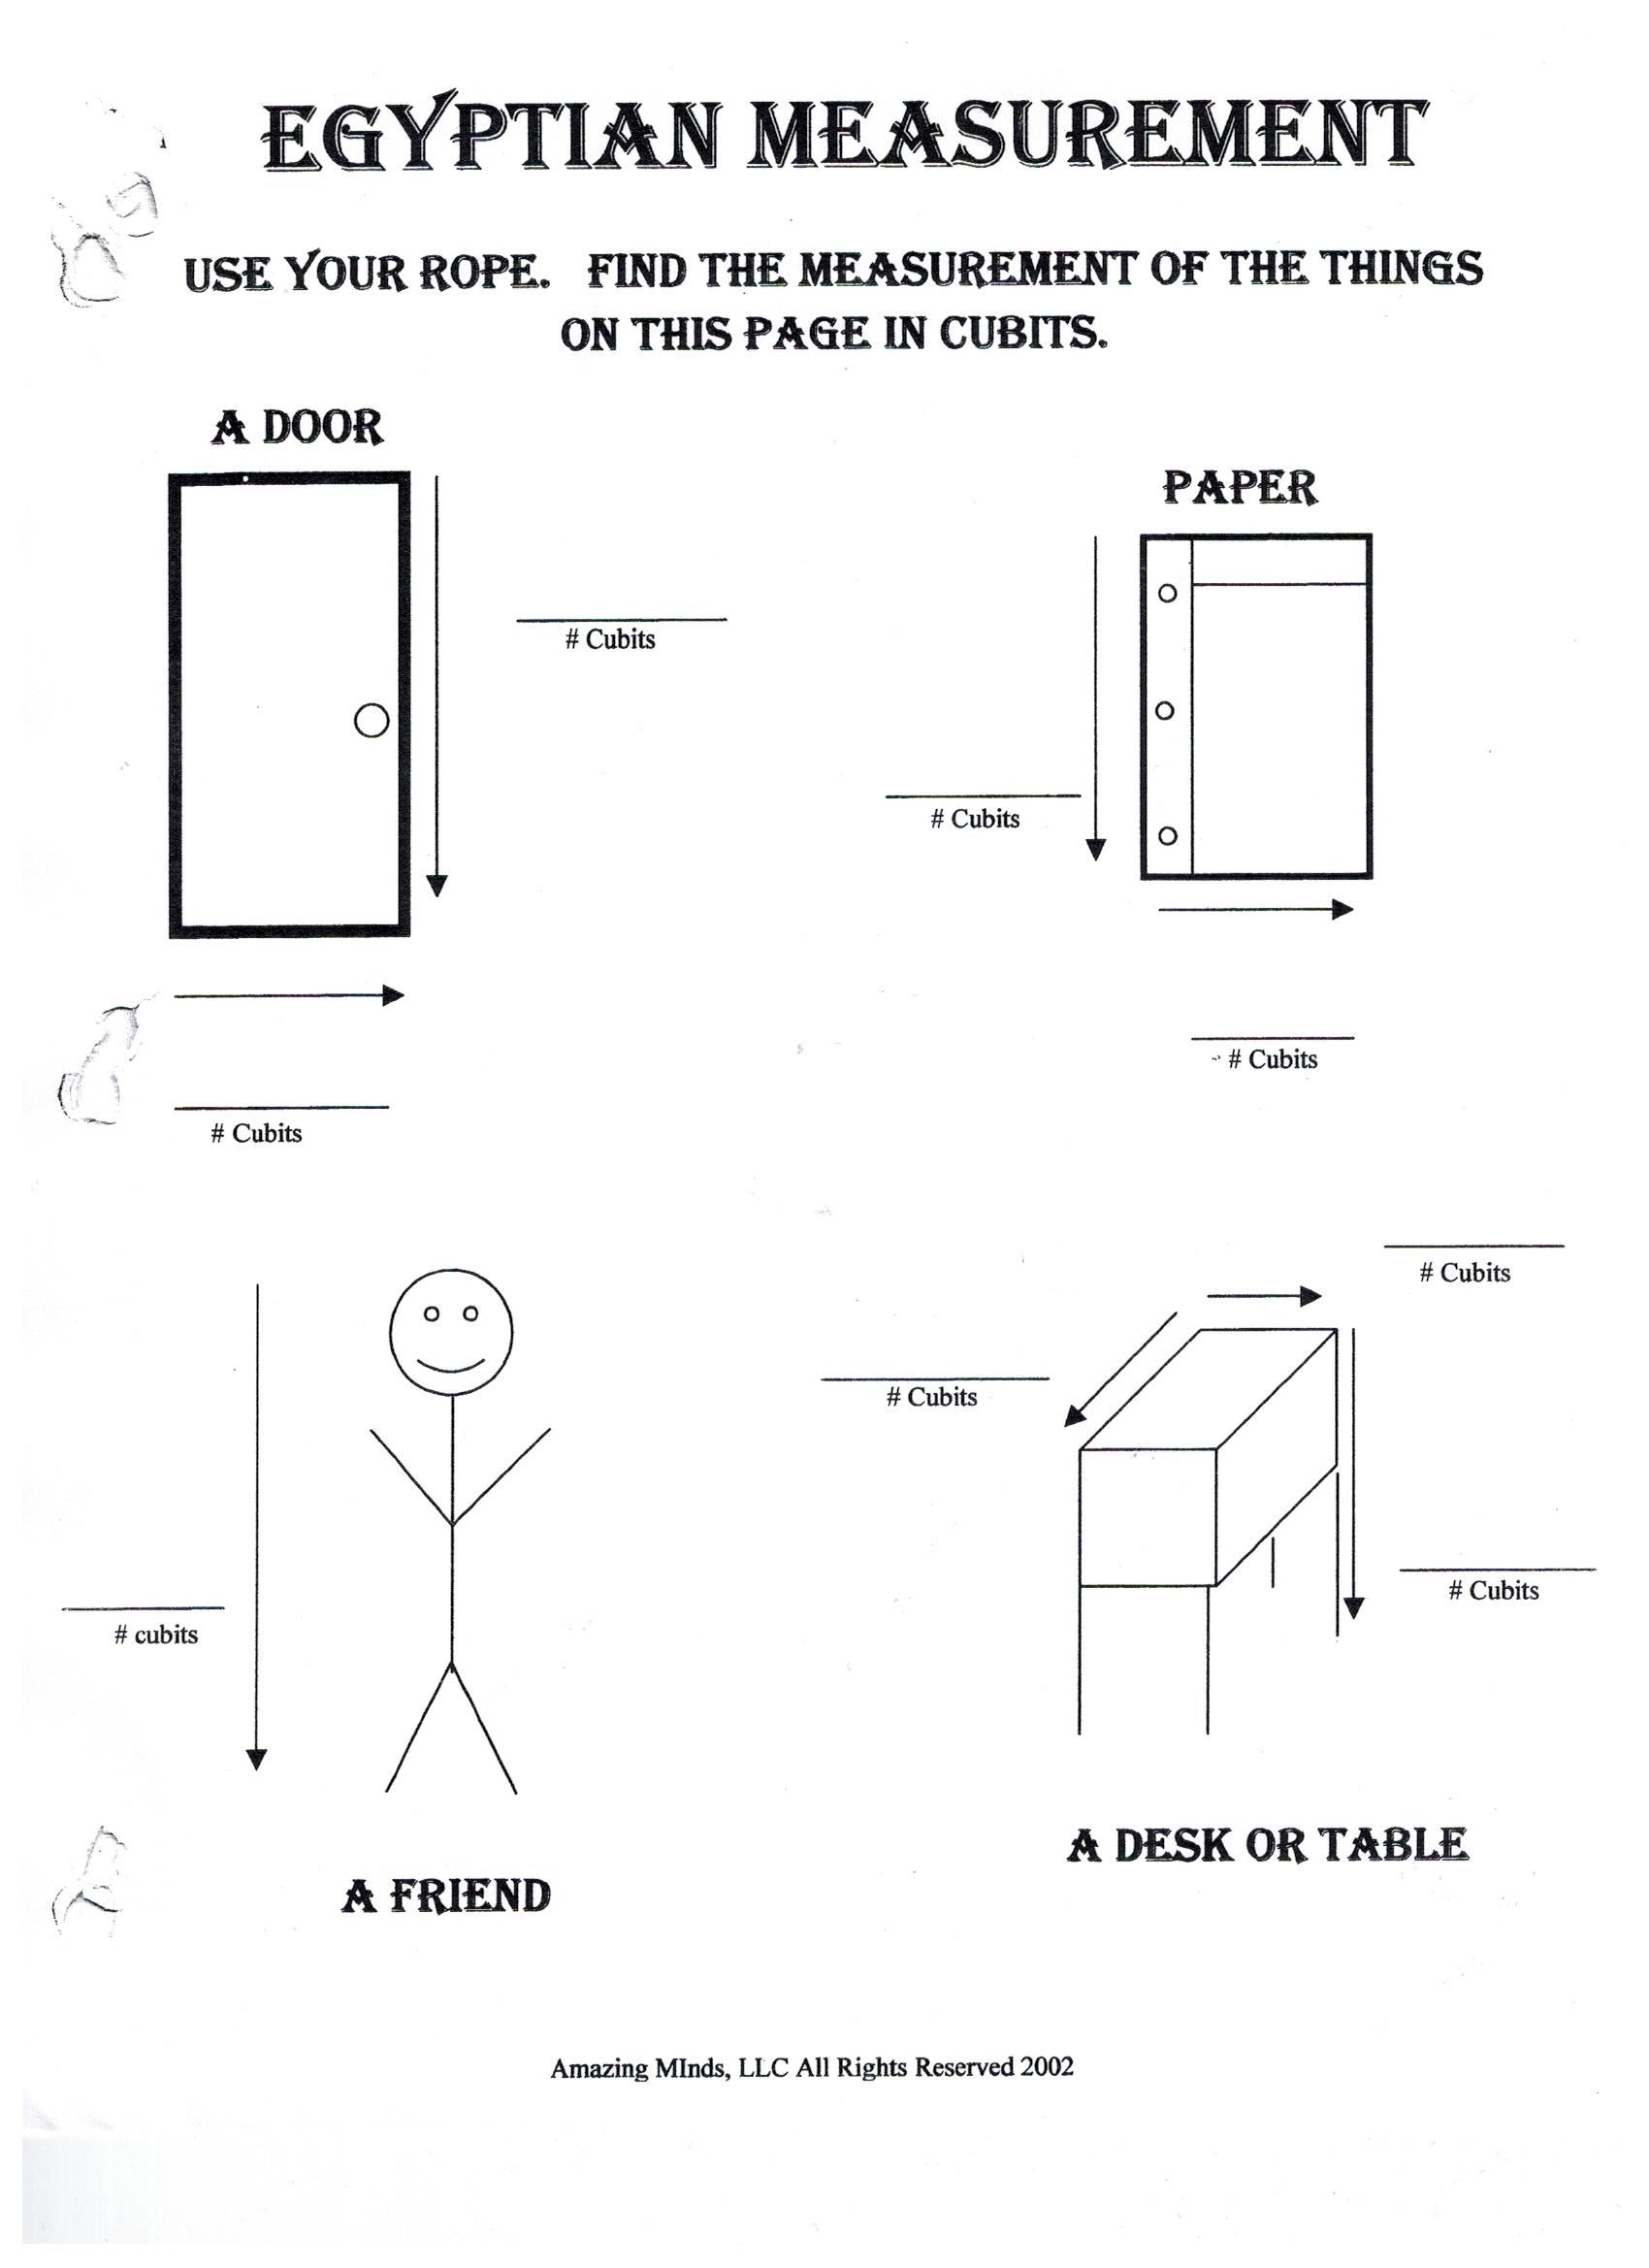
Objective: Students will utilize an Ancient Egyptian unit of measurement while simultaneously practicing their math skills.
Discussion: What is a Cubit? This is the unit of measurement used by the Ancient Egyptians. Take a piece of rope/string/yarn and hold it starting at the tip of your index finger down to your elbow. This = 1 cubit.
Materials
Directions
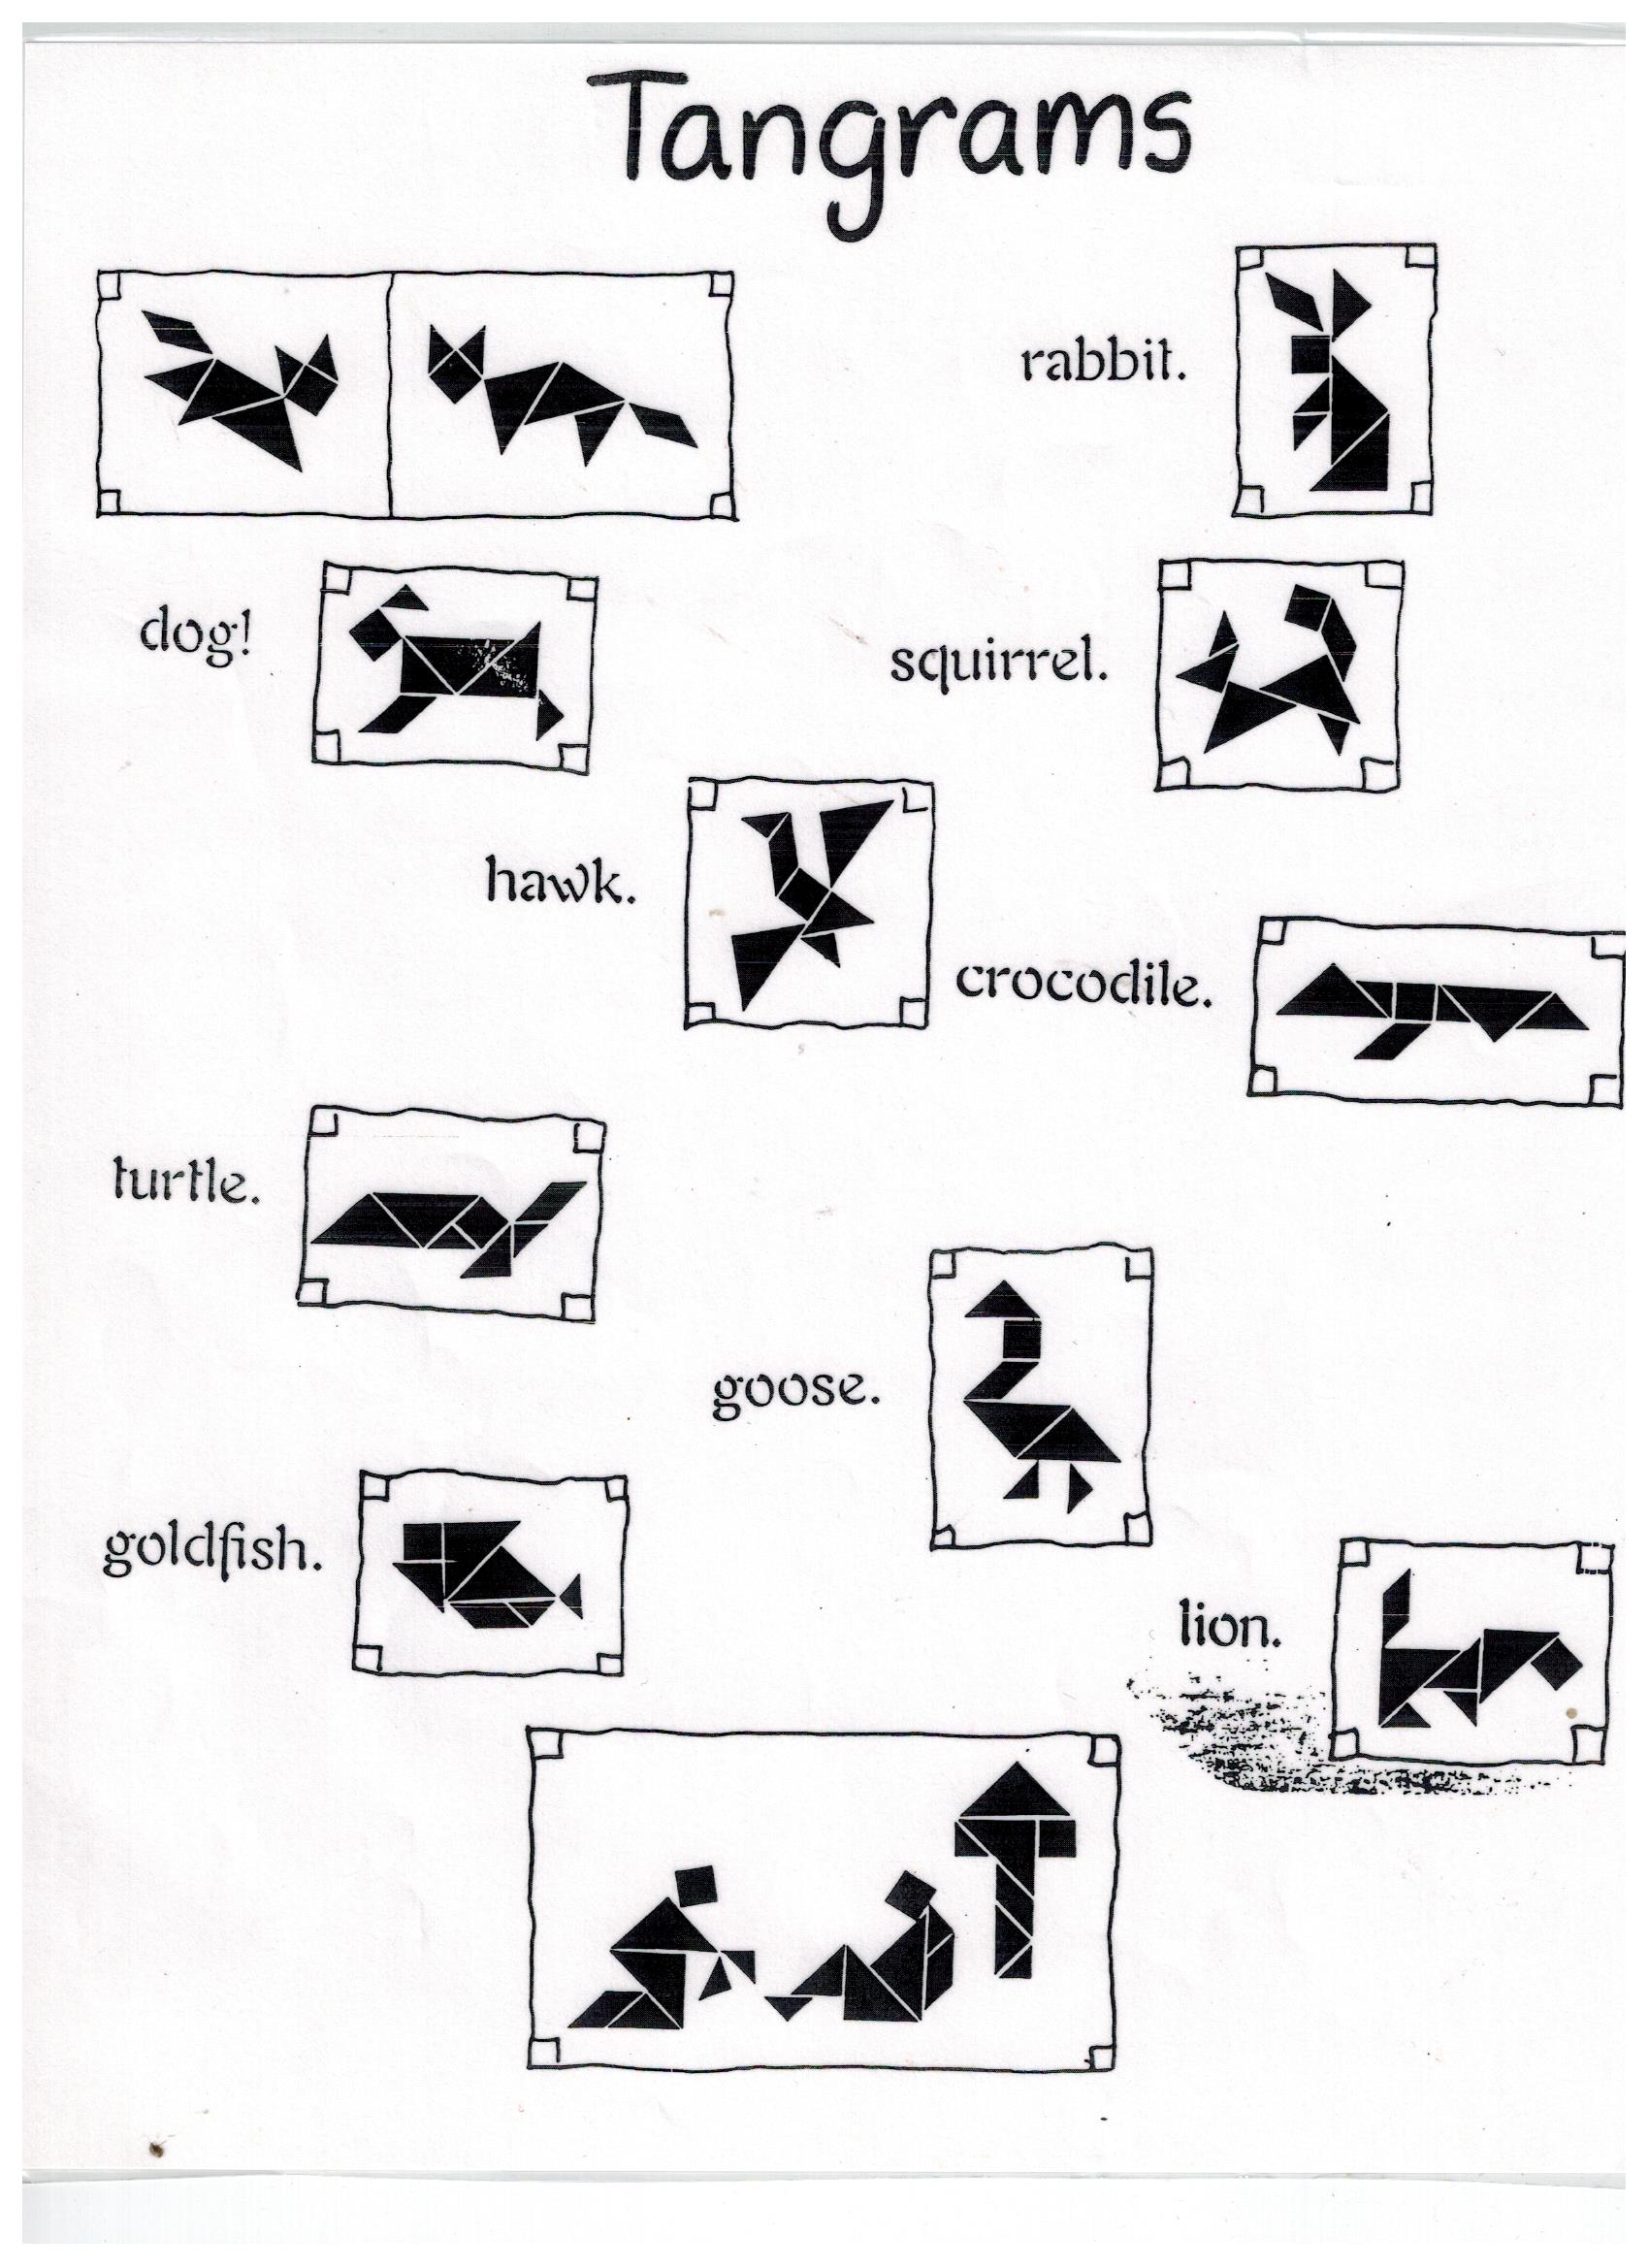
Objective: Students will use geometrical shapes to solve various puzzles.
Discussion: Tangram puzzles originated in Imperial China during the Tang dynasty. Like building blocks, tangrams can teach children about spatial relationships and help develop stronger problem solving abilities.
Materials
Directions
Objective: Students will identify the names and values of coins and use them to complete a graph.
Discussion: Explain to children that they will be making a bar graph. A graph is a way to display information about the number of items (ie- coins) you have. Discuss the name and value of each coin.
Materials
Directions
Objective: Students will practice simple addition to count the variety of germs around us.
Discussion: Germs are invisible to the naked eye but just because we can not see them does not mean they are not there. Everyone has germs and most are completely harmless and never make us sick. Ask “how do you think germs are spread?” and “How can we prevent the spread of germs?”
Materials
Directions
______________________________________________________
Objective: Students will learn how an object is able to take flight. Students will demonstrate an ability to build and fly a kite.
Discussion: A kite depends on wind to overcome gravity so that it can fly. The basic principle of kite flying has to do with air pressure. Thrust and lift are the forces that make kites fly. Thrust (ability to move forward) is created by the wind so the speed of the wind affects how well a kite flies. Lift (ability to move upwards) is produced when the string across the kite (bridle) (the skewer or straw you will tape across the kite) and the line (the string used to fly the kite) hold the kite at an angle to the wind. The correct angle causes the air to move more slowly across the face of the kite and push the kite upward. At the same time air moves more quickly across the back of the kite and reduces air pressure to create lift. The difference in air pressure is what causes kites to fly.
Materials
Directions
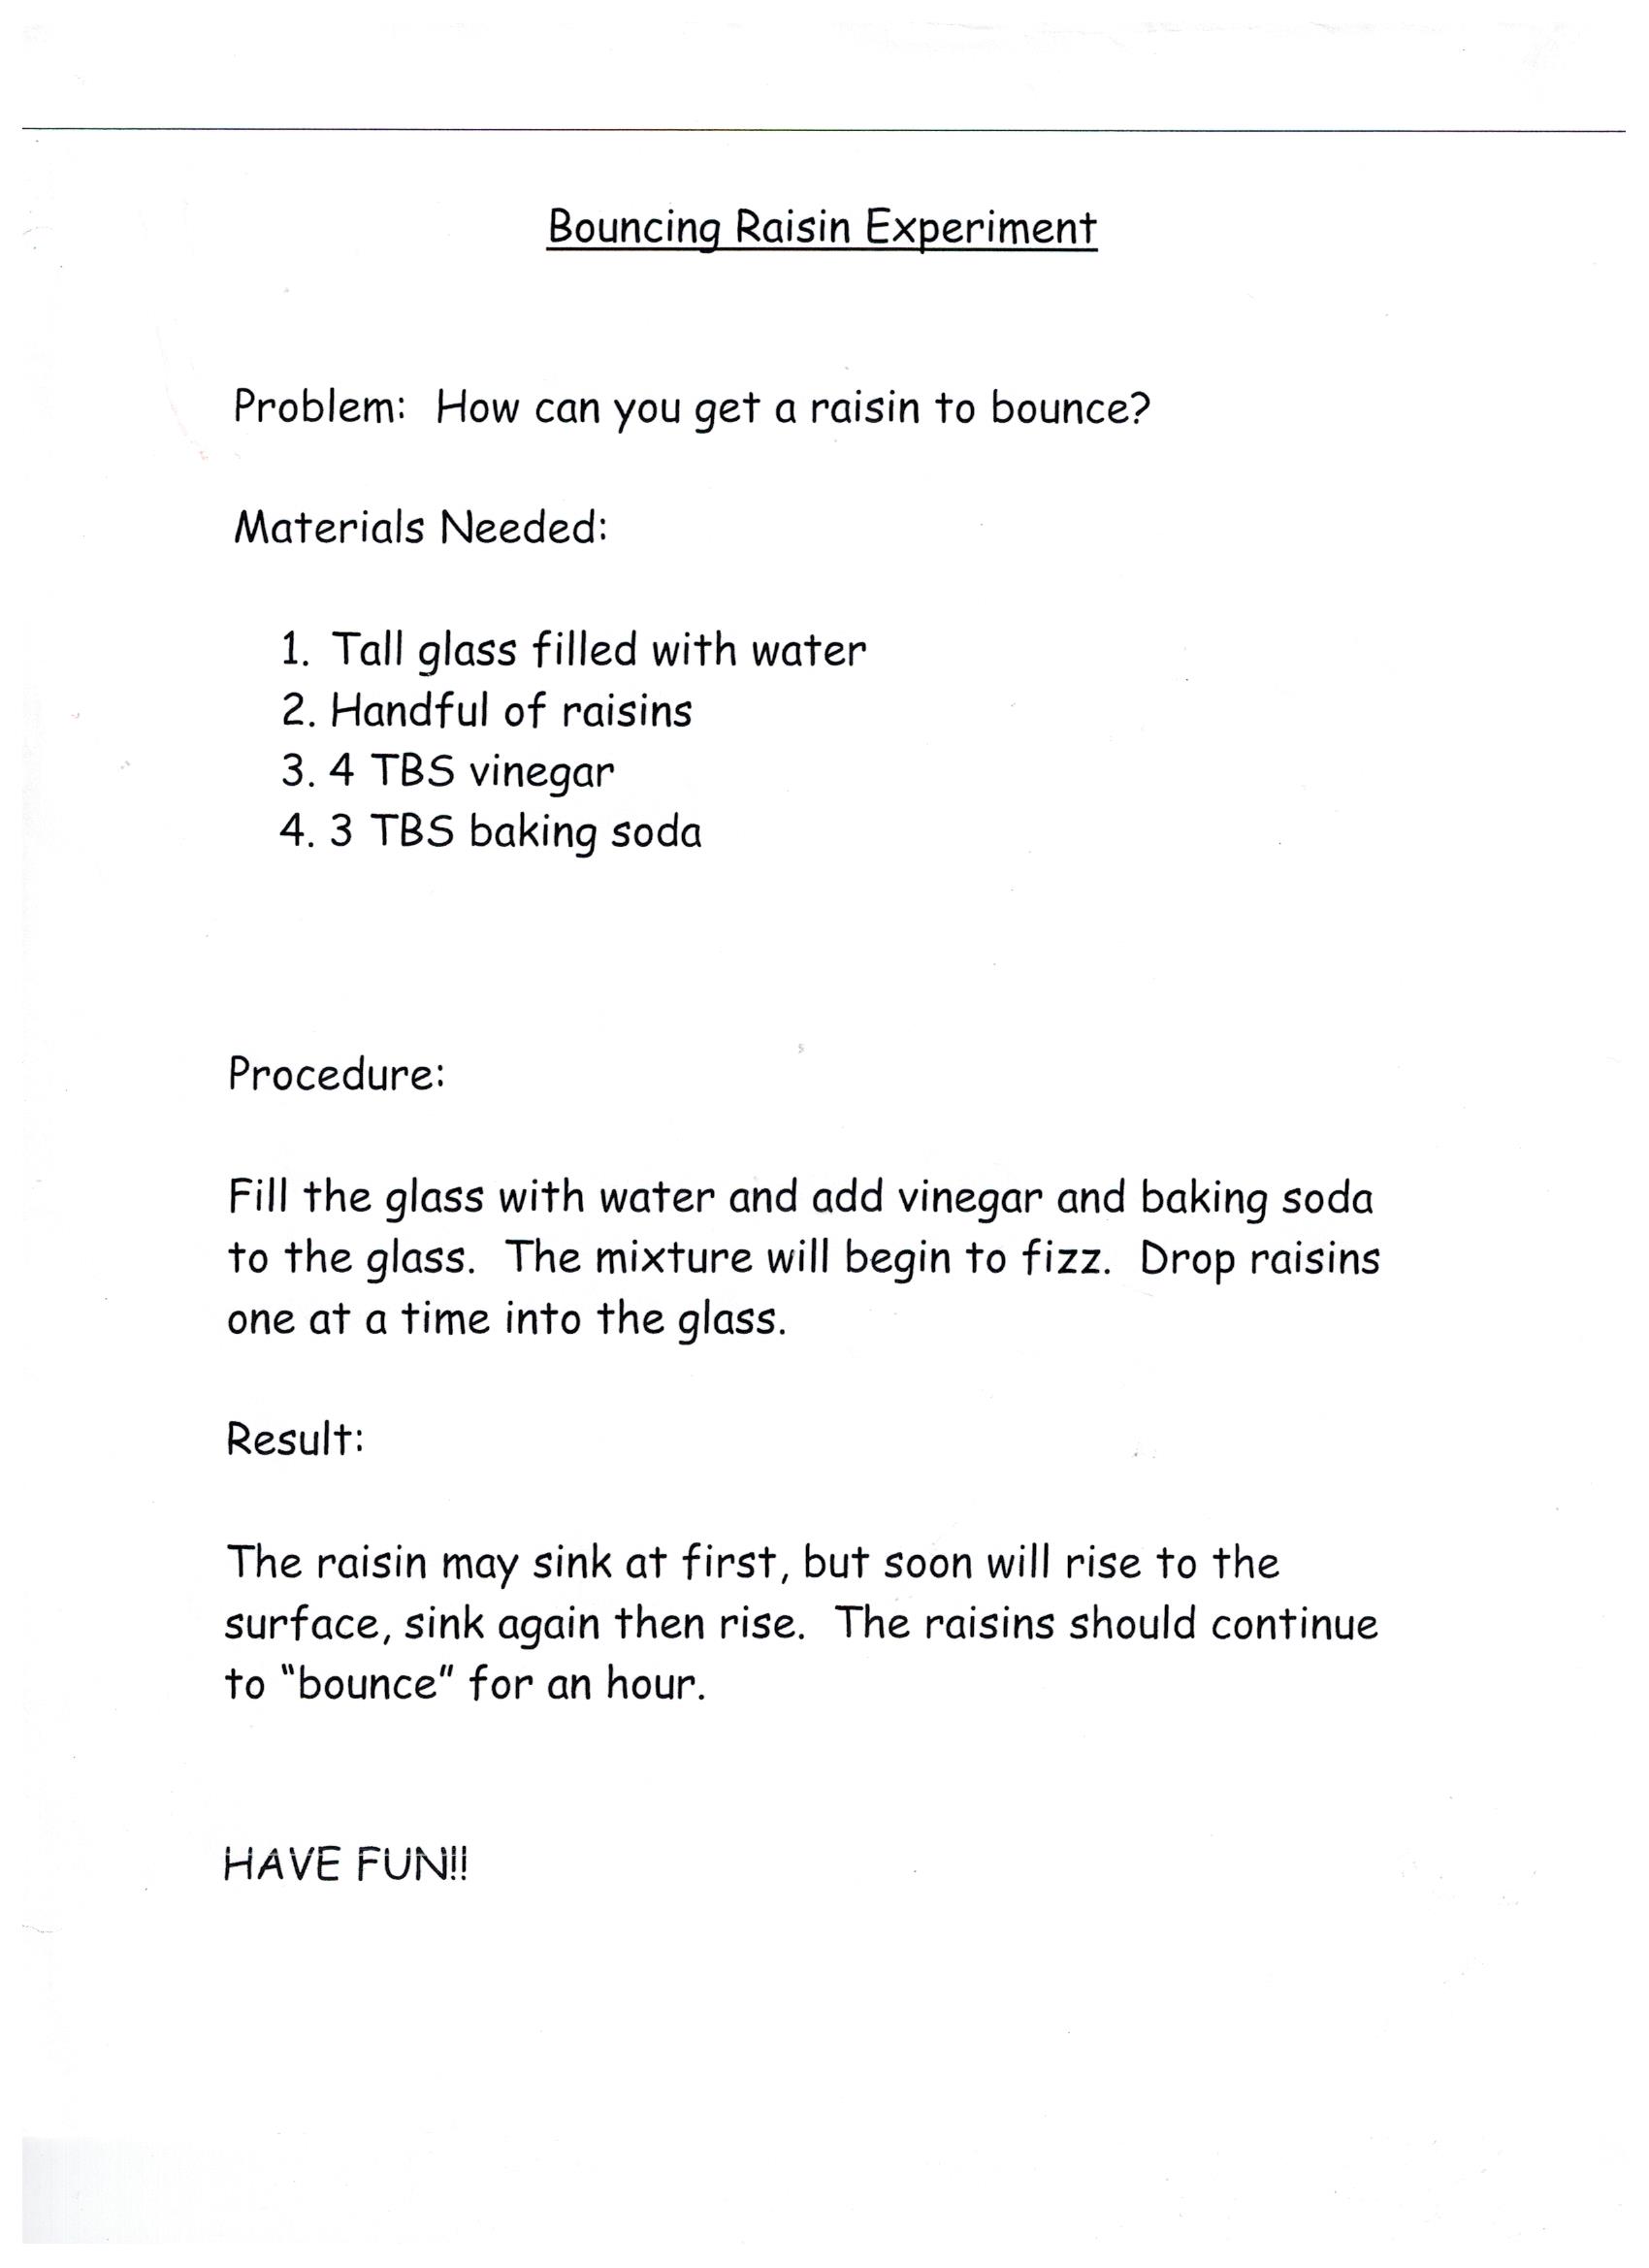
Objective: Students will use chemical reactions to perform scientific experiments.
Discussion: Chemistry is the study of the way materials are put together and studying their behavior under different conditions. With the bouncing raisin experiment, combining vinegar and baking soda creates bubbles of carbon dioxide, the same gas that is in carbonated soda. Bubbles collect on the raisins and lift them up. At the surface the bubbles escape, the raisins sink, and the process begins again. With the moving pepper experiment actual science happens because the soap breaks the surface tension of the water, like popping a balloon. It is the WATER that moves, not the pepper that is floating on it. Surface tension is caused when the molecules in a liquid cluster together. Because of surface tension, small objects can be supported by the surface of a liquid without sinking. Insects for example can walk across the surface of a pond because of the surface tension of water.
Materials
Directions
Discussion: What happens?
Objective: The student will be able to see how a cloud is formed.
Discussion: In this experiment, students will create the conditions necessary for cloud formation. Clouds form when water vapor in the air condense and stick to dust particles (that we are providing with the match). Then we cool the air by lowering the air pressure in the bottle. The black paper helps us see the ‘cloud’ better.
Materials
Directions
______________________________________________________
Objective: Students will learn, create and be able to play an authentic Native American children’s game.
Discussion: The Sacred Bowl game was invented by the Native Americans. They built their own games with materials they found in nature. They didn’t have a place to buy toys over 100 years ago, so people made their own.
Materials
Directions
______________________________________________________
Objective: Students will think of six or more rhyming words and use them to write sentences.
Discussion: How can we tell if 2 words rhyme? You listen closely to HEAR the same letter sounds at the end of the words and to SEE the spelling of the words. If two words end in the same sound or the same letters, they rhyme.
Materials
Directions
Objective: Students will demonstrate ability to put words in alphabetical order looking at the first, second, or third letter in a word.
Discussion: Alphabetical order is a way to put things in order so they are easier to find. When we put things in alphabetical order, the name of the first item begins with the letter closest to A and the last item’s name is closest to the letter Z. Things can be arranged in different orders (ie shortest to tallest, lightest to heaviest, newest to oldest)
Materials
Directions
Objective: Students will familiarize themselves with adjective usage.
Discussion: What is an adjective? It is a word used to describe a noun. What is a noun? A person, place or thing. We use adjectives to describe what things look like, how they feel, etc. What physical characteristics does a rock have? (ie- bumpy, smooth, hard, grainy, grey, black,etc)
Materials
Directions
______________________________________________________
Objective: Students will create their own stuffed whale with all the necessary body parts.
Discussion: Although whales spend all their time in the ocean, they are mammals like us. Whales have lived on the earth for 50 million years. Whales propel themselves through the water with their tails. Most whales have a stiff fin on their back that helps them stay on course while swimming. This fin can be large or small depending on the type of whale. A whale has a flipper on each side of the body. Before whales moved into the water these flippers were used to walk on land! Whale flippers are now used for steering, braking or to knock away an attacker. Whales have nostrils called blowholes. They are located on the top of their heads and allow them to breathe by surfacing, rather than sticking their whole head out of the water.
Materials
Directions
Objective: Create a beautiful planet Earth as you see it. You can make it blue/green or even rainbow- your choice!
Discussion: Factories, electric power plants, and cars are making a lot of new gases. Even trees, when they are cut down give off gases. These new gases are trapping more and more of the sun’s heat in the atmosphere. This is called the greenhouse effect, or global warming. If the earth’s temperature gets hotter by just a few degrees, it could change the weather all over the planet. Places that are warm would become too hot to live in, and places that are cold would become warm. In some places on Earth where the polar bears live, the ice is melting and disappearing and the polar bears are losing their homes. The places that grow most of our food could get too hot to grow crops anymore. Kids can help! Care for the earth! Use less energy, practice the 3 R’s, protect and plant trees.
Materials
Directions
Objective: To create a home for your new pet rock. You can try and match your rock’s new home with the characteristics (adjectives) you’ve used to describe it. (ie- if you described your rock as grey, make/color the home grey, etc.)
Materials
Directions
______________________________________________________
Materials
Directions
Join Amazing Minds - where learning is always fun!
© 2026 Amazing Minds, all rights reserved. Website Created, Powered, and Managed by The Loop Marketing  Chicago, IL